choking on water is the worst because how do you stop choking? drink something? well ive got some bad news for you
Lean your head forward, preferably to knee level, and let the water kind of drain out of your mouth. When your are able to, take deep slow breaths. No heimlich maneuver or physical assists from somebody else should be used beyond this, otherwise you could vomit and escalate the issue. Its about keeping the larynx open. Hopefully this helps.
So I can’t brush my teeth. Like, it’s the worst kind of hell. I went to the dentist for a cleaning today and I told the hygienist this, and she was wonderfully helpful.
There are some incredibly soft toothbrushes available- namely, post-surgical brushes. Running them under hot water makes them even softer.
She told me that you don’t really need to use toothpaste- it’s mostly marketing. The foam gets to me, so that is really reassuring.
She gave me two particularly soft brushes and some xylitol gum. Trident is a market brand of xylitol gum, which helps with your teeth and can make your breath smell better.
The whole purpose of brushing is to disrupt plaque buildup. You don’t need to brush twice a day, every day with toothpaste if you brush correctly- little circles, focusing on near the gums (where most plaque builds up). So if you’re having a bad sensory day and can’t brush at all, it’s not the end of the world.
Hell, you don’t even need a toothbrush if even the post-surgical ones are too harsh. Going over your teeth with the same motions using a washcloth is enough.
She wants to find a fluoride rinse that has a taste I can stand (peppermint is the only mint I can stand) but she’s not particularly worried about it.
I go to Dr. Barr in Chicago. If you can get to the State St. Macy’s, his office is nearby. He’s very kind and patient and really understanding of my needs as an autistic person. The hygienist, I don’t know her name, announced everything she was going to do before she did it, and stopped frequently to see how I was doing.
This is really the only positive dentist I’ve ever had- past dentists have been too rough and not bothered to help find ways I can actually brush.
Basically this is a glowing recommendation for Dr. Barr’s office if you’re autistic, afraid of dentists, or have sensory needs. This is a recommendation even if you don’t have any of those things.
Im actually crying i feel like this post was reblogged for me oh my god oh my god oh my lord thank you
You can also dilute your mouthwash and use it to swish around if it burns. My dentist does this so consider it dentally approved
If you were feeling guilty about your brushing habits, either due to sensory issues, pain, allergies, executive dysfunction, or just plain fatigue, here’s what you need to know about what is and isn’t necessary if your dental care!
hey there LGBTQ kids who are also Christian/Jewish! If you feel like you’re disobeying God, questioning your faith, or feel wrong and dirty for loving who you love, there’s this fantastic site I found today called hoperemains that accurately and thoroughly combs through scripture and its (many) mistranslations, validates your orientation, and basically let’s you know that you’re not pissing off God. It’s insanely thorough and after reading through every page on the entire site it’s super helpful. Go check it out!
hoperemains is completely from a Christian perspective, and not pluralistic or interfaith at all.
If you reblogged the first post from me please reblog this amendment so the Jewish peeps can access this resource too!
Trans Jewish kids, you can go to TransTorah as well!
Muslim LGBTQ kids, you can go to iamnotharaam! It’s run by a mod squad of different genders and orientations, and they take submissions from everybody!
And they are getting even more strict when it comes to not using invoices for charging for Digital Goods.
Whatever Invoices make you uncomfortable or not, you gotta start using them if you want to keep your PayPal and your money. Changes starting this October 19th.
Honestly I don’t get why so many artists are so overwhelmed by invoices, takes just a few clicks to set up.
And is not only “oh you have to use invoices because PayPal says so” if you don’t use invoices you’re putting yourself at risk of being scammed by an user abusing the buyer’s protection.
Since PayPal ain’t got no idea of what those $50 you received were for, but the buyer is saying they didn’t got anything for the money, PayPal will just side with the buyer.
I’m seriously begging ppl, start using invoices. I’m tired of seeing ppl complain their paypal was banned, or is under investigation, or worse, the $100 they got for a very complicated commission, 3 months later get a refund issue.
just
start
using
invoices
for your own sake.
Here is how you use invoices because I can’t keep playing devil’d advocate, yes I would love to help you get your PayPal restored but just this last month I had to help three persons, and they were MORE than aware of this issues.
Just protect yourself.
Step 1. You login and click here
Step 2. You click create new Invoice. YOU NEVER CLICK REQUEST MONEY, unless you want to risk yourself to get scamer by buyer’s protection exploit and not only lose your money but your paypal account, and any future paypal linked to your irl name.
Step 3 You follow this steps
1. Invoice for amount only
2. Ask your client for their PayPal email and put in that field
3. Add a vague description of what you’re doing, something like “Character Coloured with Background” is good enough, and if you need more than 1 character you can type in “2″ where it says amount, or just say “2 characters”.
Warning: don’t type in “Naruto rawing Sasuke”. That will get you banned.
4. Click send.
Optional steps. Create a template, doesn’t take more than 10 minutes and it will save you a lot of time for future invoices, you can even click on “items” right next to “create invoice” and add a list of services you offer such as “character sketch” “character flats” along with a price, so next time you invoice you just add to the invoice from your list of items and you saved yourself some more time.
More importantly, you protect yourself from buyer’s protection exploit because if PayPal knows you’re doing digital goods, then you will be allowed that you did in fact created a digital good.
Keep PayPal happy, as for right now there are no alternatives to this service, and this is the only source of income for many freelancers.
Stay safe.
Heads up, all commissioning artists
I’ll be doing this from now on!
ADDING THIS BC I HATE PAYPALLLL
OK so when you send/make invoices…it doesnt let you choose ‘digital good’ or differentiate between “goods (as in physical)” and “services” (as in doesnt need address) which is what you could do with micropayments….
SO WHEN U SEND INVOICE the buyer will be asked for their shipping address. ( I even had the options turned off for shipping?? I was pretty sure there USED TO be an option that you turned off and then it wouldn’t ask for shipping, but that doesnt seem to work anymore? I went to where the setting was and still had the boxes unchecked, and yet my buyer was still getting asked to put in shipping address, and when invoice was paid, i was being asked to provide shipping label by X date or Consequences.)
SO APPARENTLY YOU HAVE TO DO THIS as the SELLER
SO go to the invoice (i think this can be done BEFORE the buyer pays?? Didnt try myself tho, i did it after it was paid), and click on VIEW DETAILS in that first box
Scroll to the bottom of the page and click ADD TRACKING INFO
(YES COUNTER-INTUITIVE AS BALLLLLS.)
of course HERE IS WHERE YOU’RE GIVEN INSTRUCTIONS ON PROCESSING DIGITAL GOODS. HIDDEN BEHIND A BUTTON YOU WOULDNT PRESS IF YOU WERE, SAY, TRYING TO SELL DIGITAL GOODS.
Select Order Processed/Service Rendered
YAY this stuff fills itself out and you can save and not have to worry about shipping your Digital Intangible Product to a very confused seller.
I am so salt about this. excuse me while i go cry angrily.
Think I’ll reblog this for my own use…
Guess I gotta get used to sending invoices for all transactions soon then
NO EXCUSES GUYS. PROTECT YOURSELF AND OTHER ARTISTS.
So you might be saying: Lion why a guide on drawing black people? Well young blood it’s because a lot of people cant…seem…to draw…black people..Amazing I know.
Racist (caricatures) portrayals of black people have been around forever, and to this day people can’t seem to draw black people like they are human. If your artwork resembles any of the above even remotely your artwork is racist and offensive. If you try to excuse that as a stylistic choice you’re not only a terrible artist, but racist too!!! Congrats.
Whitewashing is also a problem. A lot of people refuse to draw black features on canonly black characters. While this example isn’t colored, lightening the skin-tone of a character is also considered whitewashing. So lets start with features!
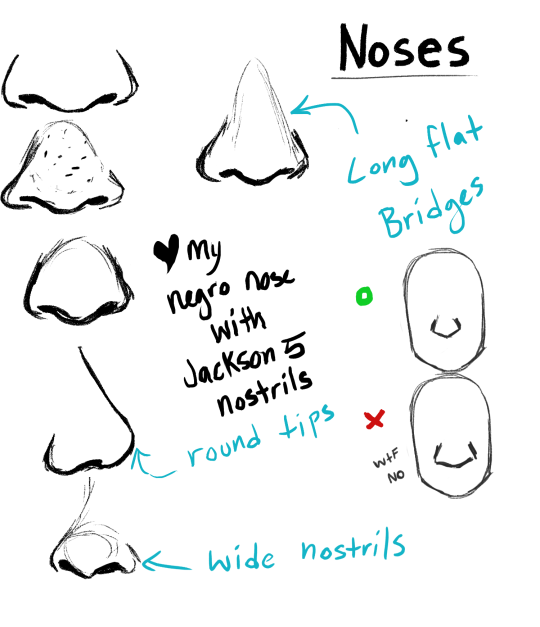
Now all black people have different noses thats a no-brainer, but black noses tend to have flatter bridges, and wider nostrils.
Please stay from triangular anime noses and small button noses.
Your drawings should not depict black people with abnormally large noses. (Especially if you do not draw other characters this way)
If you feel like the way you draw lips on black characters is offensive or resembles a caricature,it probably does and you should change it. ABSOLUTELY AVOID PLACING LIPS AT THE BOTTOM OF THE FACE.
Hair is so diverse! Please get used to drawing braids, locs,kinks and coils! If you can learn to draw ringlets and long waves you can learn how to draw black hairstyles.
Add clips! Learn how to draw baby-hairs and never be afraid to add color Pinterest and Google are free my dudes! Also try using square brushes for blocking in coils.
the whole “i used to be a teen who hated authority only to grow up to become the authority that hates teens” is a bad bad thing that practically every other generation has fallen into and we all need to make an extremely conscious effort not to repeat the fucking pattern
Studies have shown that the shift starts to happen around age 30. If you’re close to that, make a conscious effort to be open to and accepting of younger people. I’m 31 and paying close attention to how I react to young people and new trends and shit and trying to keep myself from developing those thought patterns.
people typing out accents in joke posts for critrole is funny but if any of you do it in fic i will strike you down myself
Ok I’m actually reblogging this twice because I just realized that if you don’t have practice at it, trying to express accents through dialogue can be really hard and it can be really tempting to just…type ‘em out, so I have five quick tips here:
1) Read your dialogue out loud. Do your best fake accent. Swear to god this is the best way to check if any dialogue works, accent or no. Eventually you’ll recognize that some accents have melodies. There’s a reason why they call Texan accents a drawl, so use long vowels, heavy words. Irish is quick, rolling and singsong – the more pitter-patter fast-pace you can make your verbs, the better.
2) Pay attention to sentence structure. People from different places will build sentences differently. E.g., people with particularly uppity-sounding English accents tend to say “I’ve not” rather than “I haven’t,” so I always use the former for Percy. The Texan accent Fjord uses is pretty easily evoked by dropping articles at the beginning of sentences (e.g., use “Can’t have you getting away” instead of “We can’t have you getting away”), and Jester’s Eastern European accent keeps her away from certain contractions (she’ll say “I do not” more than “I don’t” – not all the time b/c of improv, but you can use that to your advantage in fic). Molly’s Irish accent is a fun one: most other people will curse throughout their sentences, but Irish accents are one of the few that curse RIGHT at the beginning, and then you can make up fun fantasy swears!! “Hells and devils, you’ve got us in a pickle, haven’t you?”
3) Keywords and word choice. Similar to the above! Pay attention to words characters like to repeat, or synonyms they prefer over others. I already noticed Molly and Fjord prefer “coin”, while Jester and Beau say “money”. And if you think about it, both those words sound better in their respective accents! While VAs are in character, they lean almost automatically towards words that sound better in that accent, I find. It’s even better if the characters have catchphrases or signature words, because dropping those into fanfic can have readers thinking in the character’s accent and you don’t have to do too much hard work to maintain the illusion after that (be careful with overusing them, though. It’s way too easy to have Vex saying “darling” every paragraph).
4) Exceptions / onomatopoeia. Some accent-evoking misspellings or not-quite-words are common enough that writing them with apostrophes won’t kick your reader out of a story. I use “ain’t”, “oi”, and “aye” a lot for Grog, and I occasionally end his -ing words with -n’ (particularly “fuckin’”) because that’s not too intrusive. Fjord will probably drop the “ing” as well, but he’s well-spoken enough that his verbs don’t DEMAND the -n’ the way Grog’s do – but that’s my opinion! Feel it out, and remember to put apostrophes in when you drop letters o/ it’s good grammar manners.
5) Remove problem words from your dialogue. This feels kiiiiiind of like cheating but also it helps, sort of? Like I mentioned, I’ll drop the -ing when I’m writin’ Grog, but I don’t want to do that too often, so I try to write as much of his dialogue as I can without -ing words (and…it’s hard. It’s Grog challenge mode, but it’s the only way to make him sound like himself without too many apostrophes). If you come across a word that sounds SO wrong that you feel like you NEED to write it out phonetically – use a different word. Rebuild the whole phrase if you must!
Hey all, a small message to any digital artists who might be following me and suffer from perfectionism/frequent art blocks/suckish scedules. I’d like to recommend you all a game.
Drawception is kind of the online, modern media version of Pictionary in which someone submits a description and someone else has to draw that description in 10 minutes only to have yet another person describe it. To hilarious results, for example in this game which shows The tragic backstory of Waldo.
I’ve been using this site for a long while now as a kind of speed practice or when I want to make art but have no inspiration/time. I feel like it’s helped me a lot to improve my drawing skills besides, of course, being a lot of fun. I figured at least some of you would benefit from this.
I’m Drosera Sundews over there as well, send me a message if you decide to join so we can be buds 😀
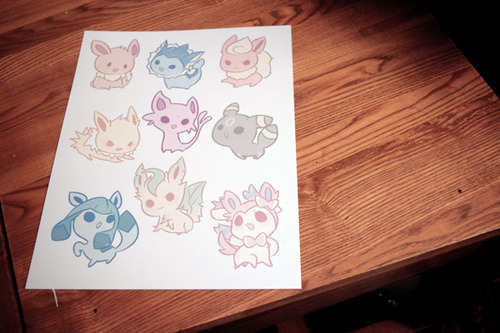
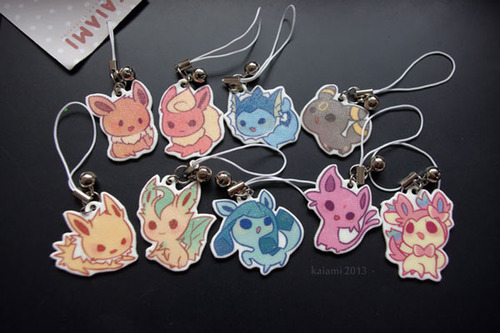
I know a ton of you have been waiting for this one. Teaching you to make your own plastic keychains!
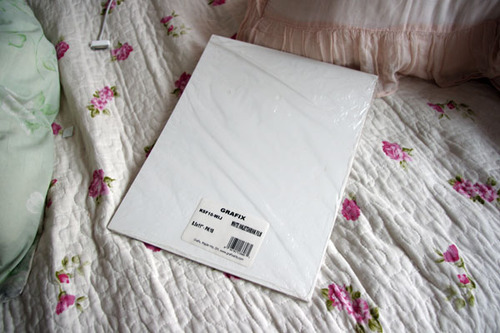
To start off, I think the biggest question everyone has is what I use to make them. I work with shrink film. You might be familiar with Shinky Dink brand shrink film as a kid. I use Grafix brand white inkjet shrink film. The inkjet kind is relatively pricey compared to the regular kind. If you’re using regular, I don’t recommend you stick it in your printer. Sharpie markers would be good for that.
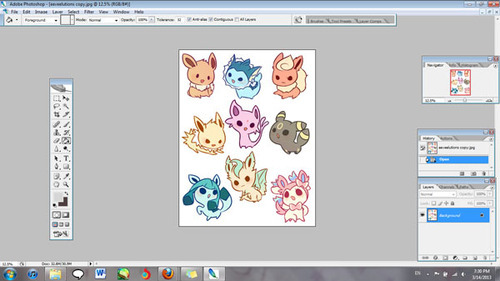
Alright, now open up the file with the images that you’re working with. Make sure your images are a lot bigger than you want your finished product to be since they shrink significantly.
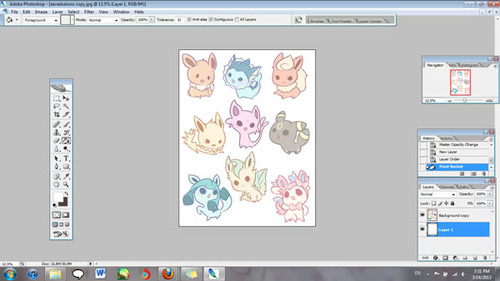
You’ll also want to lighten the opacity to about half. I go somewhere between 50-60%.
Now print your image out! I’ve found that it works best for me when I have it at the plain paper setting, and standard print quality.
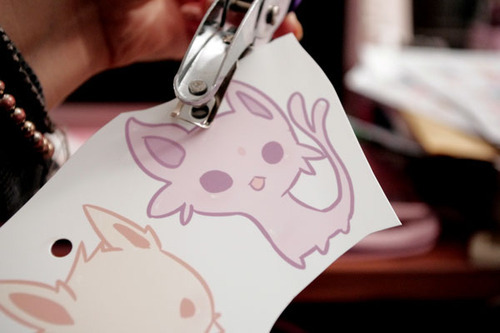
Holepunch with a ¼" holepuncher BEFORE you shrink them. It’s so much more work to have to punch holes when your plastic is thick!
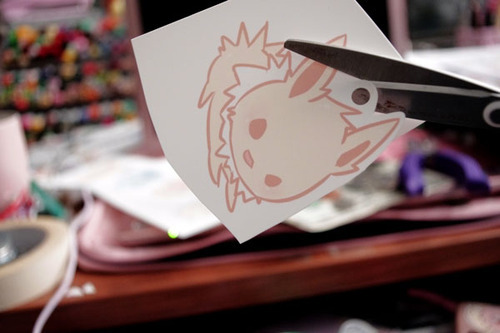
Cut out your design, leaving the amount of border you want.
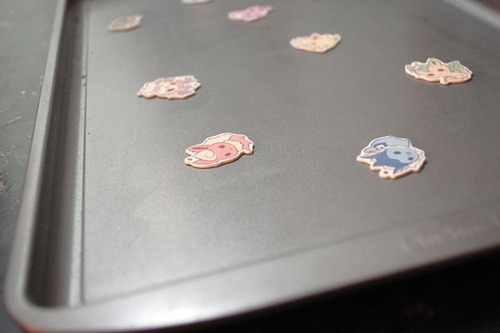
Set them on a tray for convenience. An aluminum foil sheet works too, but I recommend cookie trays because they are easier and quicker to get out of the oven.
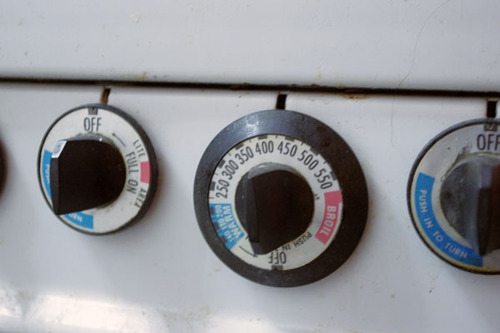
Preset heat. Your shrink film package will tell you what temperature to set it at, but I find that it isn’t always accurate for me. I generally set temperature to 350 degrees or so.
Put them in the oven. Remember to keep track of time! I leave them in for about a minute and a half.
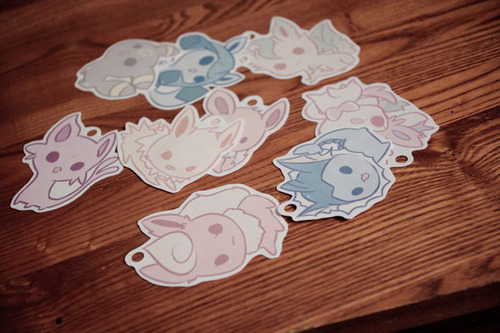
After time is up they should be super small! Magic!
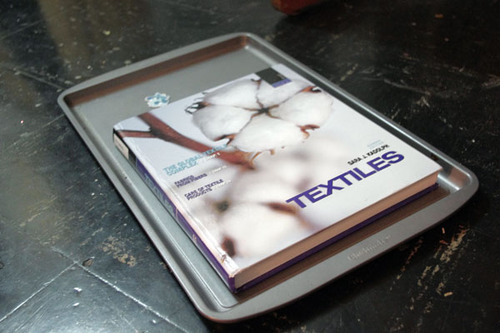
If your charms are not flat, put something heavy on it right out of the oven when they are still hot and malleable.
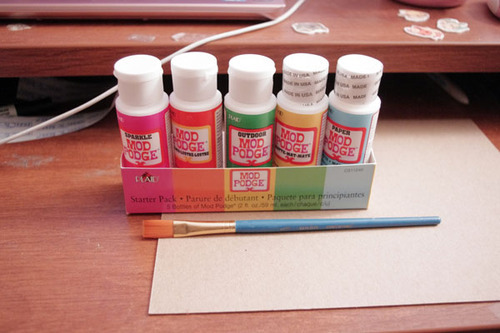
If you’d like to, you can seal them now. In my last two batches, I used clear topcoat nail polish. The problem with that is that I need between 3-5 coats of it, and it takes a while to dry. I’ve been experimenting with modpodge.
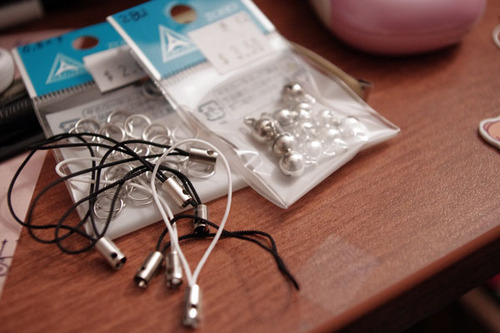
For lariats, you can use jump rings or lobster clasps.
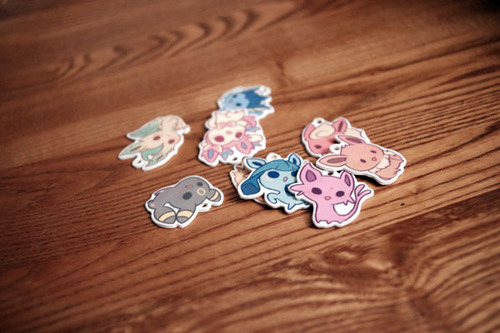
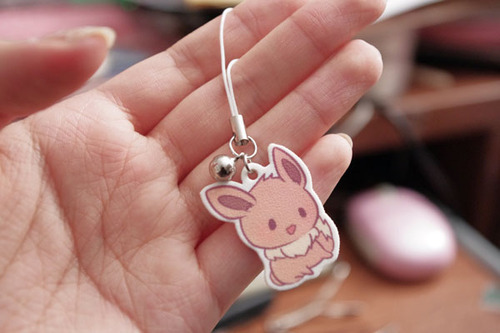
Here is one that I made that wasn’t sealed. The finished texture after shrinking is a little bit rough. There’s nothing wrong with leaving them unsealed, but because they are inkjet printed, the colors wash right of without protection.
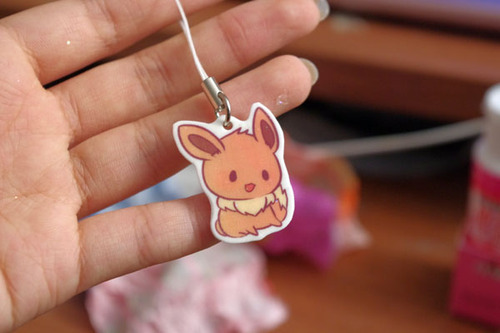
This is one that was sealed with modpodge. The colors become a little more vibrant and smooth and water resistant. Things often get stuck on when applying or drying so be careful.
These ones down here were sealed with clear nail polish. They come out shiny if you put enough coats, but the grainy texture will still be there.
Well, there ya go! Have fun making your own keychains!
fullten dunno how in to DIY you are, but this seems like a way to get more cute things in your life.
This is super cute
I do this!! You can also glaze them with Mod Podge Dimensional Magic! It gives it a nice, shiny surface. Resin would work too, and it would be more durable.